Acrylic sheeting is widely known as Plexiglas©. Plexiglass©, however, is the name given to acrylic sheeting manufactured by Atofina. The same acrylic type sheeting is also known by the names Acrylite©, Lucite© and Perspex©. From this point on, I'll refer to it simply as acrylic.
Before we go any farther... Do not peel the protective coating from the sheet until the last possible moment. Acrylic sheeting is very easy to scratch. It may be even easier to scratch than CDs.
Cutting Acrylic:
There are a couple of different ways to cut acrylic. Since my experience is mainly with thin acrylic sheeting (1/2" or less), that's what I'll cover.
Table/Circular Saw:
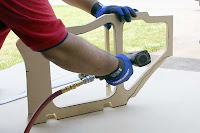
For rough cutting acrylic, you can use a table saw or a circular saw with a fine blade. Blades with fine closely spaced teeth (like those used for plywood) will work relatively well. Blades with widely spaced teeth (like the type used for cutting MDF) will cause a lot more chipping. I've used an Oldham B7254760 on a circular saw with good results. When using a hand held circular saw, use a guide to make sure you get a straight cut with minimal chipping. There are blades made specifically for cutting acrylic. If you're going to be cutting a lot of acrylic or are using very expensive (thick) material, you need to invest in a blade specifically designed for cutting plastics and laminates.
Jig Saw or Band Saw:
Jig saws can be used to cut acrylic when you need something other than a straight cut. To reduce the work of cleaning up the cut, use the finest blade that you can find. Blades with reduced depth (like those used for scroll work - shown below) will work best due to less friction and less resistance when turning the blade. You'll have to experiment with cutting speed to see what works best. Too much pressure can cause excessive chipping. Going too slow may cause the acrylic to melt. If the acrylic melts when cutting, use a light lubricating oil. Have someone apply the oil to the blade as you're making the cut. DON'T use an aerosol dispensed oil. The propellant may be flammable and may be ignited by the jig saw motor. I've had good results with the blade shown below.
Router:
A router can be used to cut acrylic for either straight or curved cuts. For curved cuts, you'll want to use a router with a collar and a guide (pattern or jig made with 1/4 inch plywood). You'll want to rough cut the material within ~1/8 of an inch of the desired finished shape. Trying to cut too much acrylic will lead to melting of the material. Again, you'll have to experiment with the speed of the cut. To prevent chipping, make sure the blade is not allowed to break contact with the cut edge. If it does break contact with the material and you push the router blade back into the edge too quickly, the cutter may chip the acrylic. You also must make sure you have a sharp bit (carbide recommended) to prevent melting of the material. Again, you'll have to experiment to see what works best for you.
Score and Break:
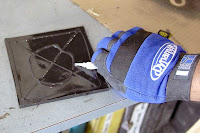
Thin acrylic sheets (less than ~1/4") can be cut much like regular glass. Instead of using a hardened wheel to chip a line in the glass, you'll use a scoring tool to cut a deep scratch in it. The cutting edge of the scoring tool looks something like a single tooth of a table saw blade (but much thinner). You apply pressure to the tool and drag it along a straight edge guide (which should be clamped securely in place to prevent it from moving). You need to continue scoring the acrylic until the cut is ~1/8 of the way through the material (it may take 20 passes on 1/4" thick stock). After that's done, you'll have to clamp it down on the edge of a table (or something similar). The edge of the table needs to align with the cut. The edge of the table needs to be perfectly square (a radiused edge on the table won't provide the proper stress along the desired cut line). It needs to be clamped very securely so that it can not flex or move. You'll then apply pressure to the piece that's beyond the edge of the table until it snaps. If it was cut deeply enough, it will break cleanly along the desired line. If it was not cut deeply enough, the cut (on the side opposite the scoring) can be as far outside of the desired cut line as the thickness of the material. The image below shows an inexpensive scoring tool (I think it cost ~$3)
Polishing the Edge of the Cut:
Depending on the quality of the cut and the desired end use, the edge may need to be polished. When using the acrylic as a window on a speaker enclosure or for an amp rack, you'll probably want to polish the edge. To make things easy, use a rubber or foam block and waterproof sandpaper. Since it will be nearly impossible to keep the edge perfectly square, I'll usually round it off. With a foam sanding block, start with rough paper (~180 grit). Wet sand with lots of water until the edge is uniform and relatively smooth. Then change to finer and finer paper until you get a satin finish with 600 grit paper (180, 360 and 600 grit will work fine). Remember to use lots of water.
Flame Polishing:
After the edge is polished to a satin finish, you may want to get it to a glass like finish. To do this, you can use a propane torch. Let me recommend that you practice on a scrap piece first. Using a propane torch, you very quickly pass the torch over the edge. You must move the torch very quickly. If you go too slowly, the acrylic will melt and boil. This will leave bubbles in the surface. This is from heating the acrylic too deeply. You only want to heat the very outermost edge/surface to its melting point. This will allow it to flow into a smooth glossy surface. As long as you're moving very quickly along the acrylic, you're not likely to cause bubbles (even if you're using the hottest part of the flame).
Practicing Flame Polishing:
The material that a CD is made of reacts similarly to that of the acrylic sheeting. If you want to scuff up a CD with some 600 grit paper (and water), you'll be able to remove most of the finer scratches and haze with the torch. Remember... Move VERY quickly along the surface. Allow the CD to cool between passes with the torch (just as you would when polishing acrylic). Don't you use a good CD. Try it with one that will not play. Heating the CD will cause it to cup slightly and it probably won't play anymore. This exercise is only to allow you too see how the process works. Two final suggestions... Don't burn yourself and don't burn your parent's house down.
Drilling Acrylic
Spiral Bit:
Standard spiral drill bits will not work well on acrylic. Their cutting angle is too aggressive which causes it to try to cut too quickly. This will lead to cracking and chipping around the hole. If you want to use a bit that can be used for metal also, try a bit like the one shown in the following photo. You can see that the main cutting edge is flat instead of angled like a normal bit. This causes the material to be cut in a more controlled fashion. If you don't want to spend the money on a new bit, you can grind a regular bit to the same profile.
Forstner Bit:
Forstner bits are very high quality bits that are generally used for woodworking. They make a very clean hole with little or no chipping. When used for drilling acrylic, you may need to use a cutting lubricant. I generally use a '3 in 1' type oil. Apply the oil to the cutting surface prior to drilling and to the drill bit shaft as you're moving through the material. If the bit is used dry, the friction between the sides of the bit and the material will cause the acrylic to melt (very bad). When used with lubricant, the hole will be very clean.
Standard Woodboring Bit:
Some people recommend against using woodboring bits but I've never had a problem with them. One advantage of the wood bit is the long centering point. This point will exit the other side of the material before the cutting edge. This allows you to turn the material over and drill from the other side. Since the cutting edge will not be pushing out as the bit cuts through surface of the material, there will be little or no chipping on either side of the material.
When using any of the different bits for drilling acrylic, you should:
- Go slow. Do not force the bit to cut too quickly.
- Use a drill press. This allows you to have much more control over the cutting speed and assures that you're drilling the hole perfectly perpendicular to the material. You should clamp small pieces down. If the bit grabs the material and spins it, it will cut you. Small pieces don't allow you to get a good enough grip to prevent the piece from spinning with the bit.
- Practice on a piece of scrap material. If you crack a piece of acrylic after you've already polished the edges, you are not going to be happy.
- If the acrylic melts as you drill through it (regardless of rate of rotation/feed), try using a light lubricating oil to reduce friction between the bit and the acrylic.
Fasteners:
When screwing a piece of acrylic down, you'll need to use some type of washer under the screw. Fiber, plastic and rubber washers will work. If you can't find those types of washers, standard metal flat washers will be better than nothing. If you use washers, you're less likely to crack the material if the screw doesn't go in prefectly straight. Predrilling the hole in the wood will help assure that the screw goes in straight. When tightening the screws, do not overtighten (especially when the surface under the acrylic is not hard). If there's a soft gasket under the acrylic, overtightening the screw will cause the material to crack. You should also use pan head screws (those with a flat mating surface under its head). Using bevel or bugle headed (drywall) screws will cause the acrylic to crack


